Whichever period of history you are recreating on your wargames table, decent scenery adds so much to the pleasure of your game.
These days, there is much to choose from, produced by a number of manufacturers and most commanding reasonable prices. But if, like me, you are a modeller as well as a gamer, making your own can be fun and rewarding. Unfortunately there are very few articles in wargame magazines showing you how to do this but I would recommend the Hornby magazine - intended primarily for railway modellers - but always full of brilliant hints and tips for making scenery and using proprietary items.
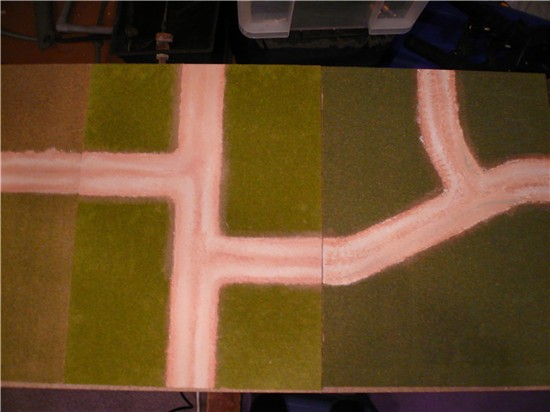
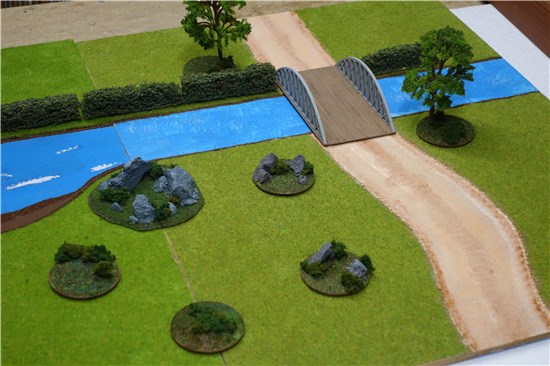
I use a system of 6mm MDF boards cut to either 24” x 12” or 24” x 18”. These are covered by proprietary “flock paper” that comes on a roll – Heki I think make it – and have a pattern of roads leaving the boards at various points in such a way that the boards can fit together in a number of ways. There are also plain green boards, some with a river (see the photos of the game with the Airfix bridge), and some sea/beach combinations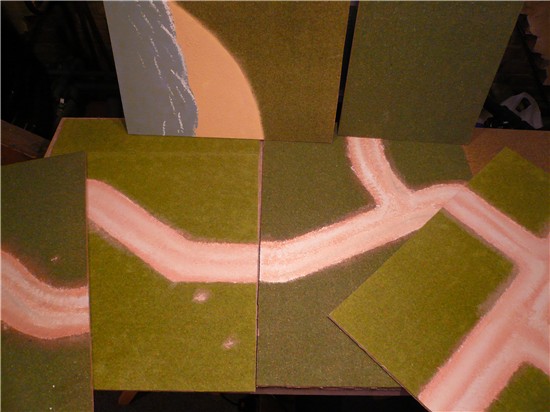 .
.
The road system includes some straight sections, junctions and curves. The boards are reversible and a different pattern is created on the reverse. Whilst this reduces the ability to have contours as part of the board itself, it means that I can create millions of baseboard combinations with only 25 or 30 actual boards. Hills and contours are created by the new modular hill system - see "Hills" below.
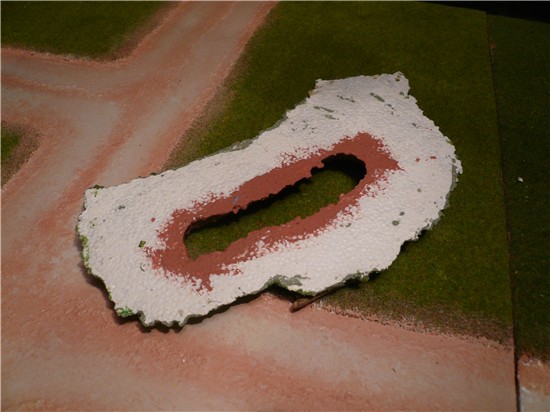
Below; later scenery boards featuring river sections. These are set out on the boards in the same way as the roads so that lots of variations can be achieved by just a few boards.


This picture was used in the Heroes All rulebook to explain river crossings but it is repeated here as a close-up of the river boards. You can see that the rivers are just blue versions of roads with a brown edge representing the bank. The base is a thin coat of paint and PVA mix which gives a textured base. Leave to dry overnight and then paint over a couple of coats of blue emulsion from a test pot. Leave to dry overnight again and then very lightly dry-brush with white to lift that texture.
To suit the other terrain boards, I have made a couple of road/river crossings which can be used either as fords or sites for bridges. There are river bends and one with a small central island. As ever, the river boards all fit together, much as the road boards do.
Finally, there are some wider river sections (shown in the Gallery section) which link up with the "beach" boards so that a river estuary can be created. This is shown in the photos of the Gela boards elsewhere on the site.
Cliffs are under construction - a series of new modular hill sections with a rock face on one edge, designed to sit against the "beach" to create a rocky coastline.
Walls are made from Plastikard bases and small stones intended for use in fish tanks. A bead of Unibond NoMoreNails is run along the card base and the stones pressed into it. When dry, repeat this process and use a third layer to create a top. As you can see, broken down walls are easy to make as well. The finished article looks like the wall at the back. Paint dark green all over and then dry-brush light grey before adding scenic flock material to the base using PVA glue.
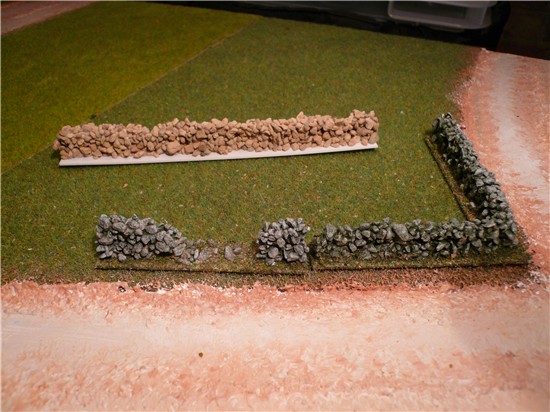
Wall sections of different lengths are produced along with corners and gapped sections. Although not shown here, I also have some with trees and large bushes integrated into the base.
The walls can also be glued directly onto the base of a building to crate a perimeter - perhaps as the wall of a pub or farm building.
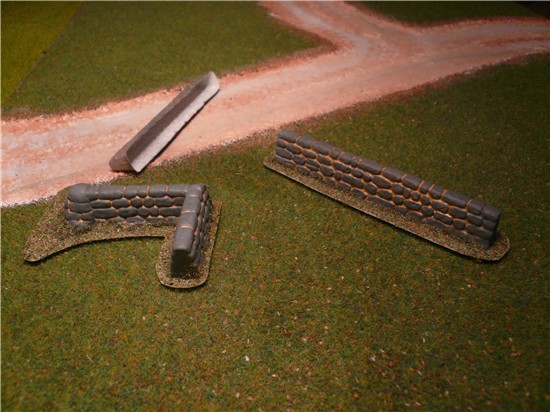
As an alternative, use plastic walling. (See photo l-r) (i) two sections cut and fixed to make a corner, (ii) the walling comes unpainted and is simply a "blown" plastic shape and (iii) the section cut out with some of the base still attached. Paint the mortar colour all over and then dry-brush the grey walling colour. Flock the base again to match the game boards.
The home-made stone walls can be a bit delicate so if you share your scenery pieces with younger players or if they need to survive a club environment, these plastic pieces may be a better option. In both cases, a quick once-over with a decent varnish offers a bit of protection. I use the spray can struff as varnish can be a bit of a nightmare in an airbrush nozzle!! For those on a budget, cheap ladies hairspray is almost as good.
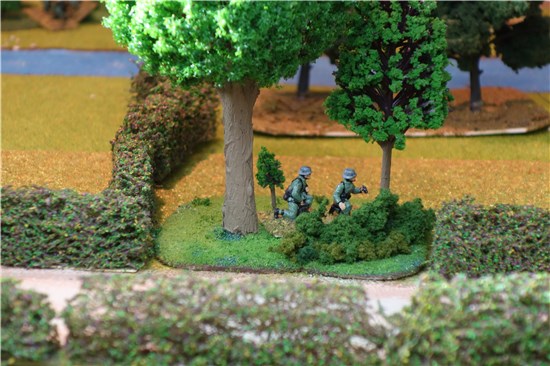
I have used this picture elsewhere but repeat it here to show the new version of tree bases. The actual base is foamboard from an art shop - a really cheap material given that it comes in large sheets for a few pounds/dollars. The trees are an eBay purchase from China - nothing expensive - the trunk is painted light brown and the plastic canopy flocked as required (I hadn't done these ones). The trees are stuck to the base with PVA and left overnight to dry. The base is then painted with a brown emulsion paint mixed with some PVA. When dry, that is then covered with PVA and flocked. The lichen "hedge" is added later and can be flocked as well if required. Spray with whole base with a very diluted mix of PVA and water to seal it all in. Leave overnight to dry and Hey Presto!
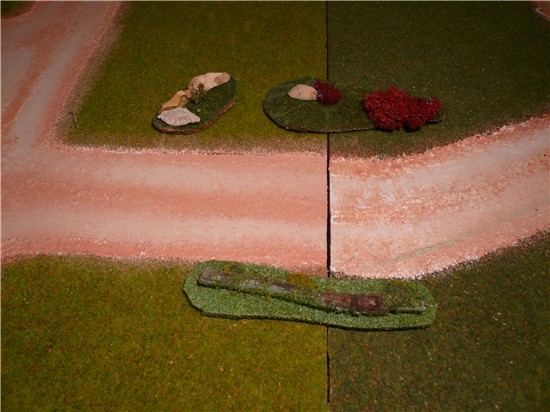
Ground cover is easily fabricated from various stones, twigs and lichen pieces set onto a base of cork sheet. The cork is either covered with “flock paper” to match the board or flock material as per the walls above. The lower picture reveals the underside to show construction details.

I have about a dozen of these pieces ranging from the small stone pile (top left in the upper picture) to those about 4 inches square and including trees.
I have used twigs and stones from the garden plus one cork tile and some flock material - total cost is easily under £1 – not bad value and fun to make as well!!
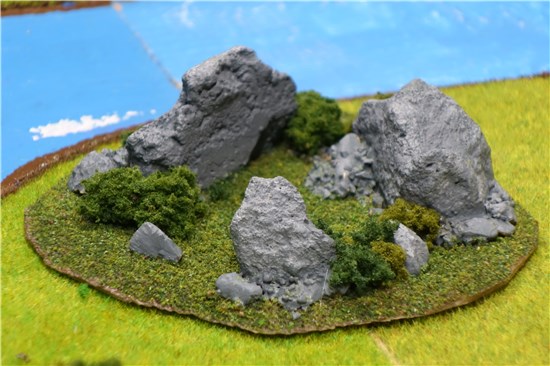
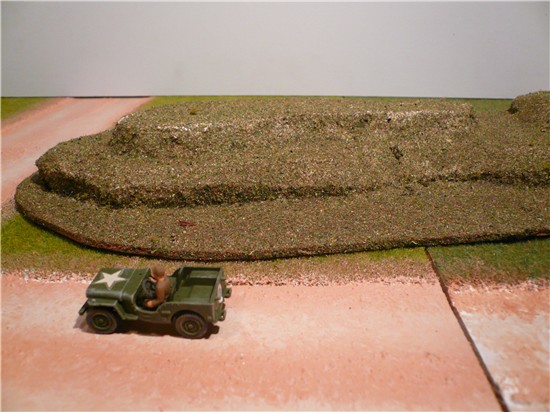
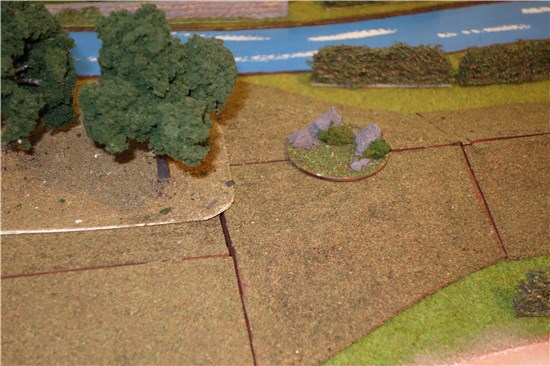
This rocky outcrop is ideal for hiding in or just breaking up open ground. The base is foamboard and the rocks are just lumps of old plaster - they fell off the wall of the house during decorating and I kept them because they "looked useful". Knocking them into random shapes and glueing the to the base using PVA was a quick job. You can see that I also added some of the little bits that fell off the bigger bits. Leave overnight to dry and then mix up some brown emulsion with a good squirt of PVA to paint EVERYTHING including the rocks. Leave overnight again and then drybrush the rocks with shades of grey - start with an overall coat of medium and get lighter and lighter. The final dry-brush on the tops is VERY light using white. Paint the base with a mix of brown emulsion paint and PVA and leave to dry overnight. Then add more PVA and flock the base. The lichen hedges are added last and the whole thing sprayed with a very dilute mix of PVA and water. Leave overnight to dry and then simply add to your wargame table.
Here are a selection of different bases - the 4 small circular ones are made on laser-cut mdf bases as an experiment but the rocks and hedges are added just that same. Note how some are deliberately formed to provide cover for a FOO or sniper team. The bridge is scratchbuilt using 2 laser-cut girder sides and a base made from coffee-stirrer sticks obtained free from my favourite coffee shop. Simply glue them together on top of couple of cross-members underneath. As wood looks like wood, the painting is more of a wash than a paint and a bit of weather to represent wear and tear was all that was required. I painted the girders grey to represent steel.
In urban areas, make some roadblocks using either matchstick "X" sides and a cocktail stick barrier painted red/white, or raid the spares box for lots of old junk to make something more akin to the barricades put up by civillian defenders. Old Dinky/Corgi/etc models of the right era are a good start to produce burned out vehicles
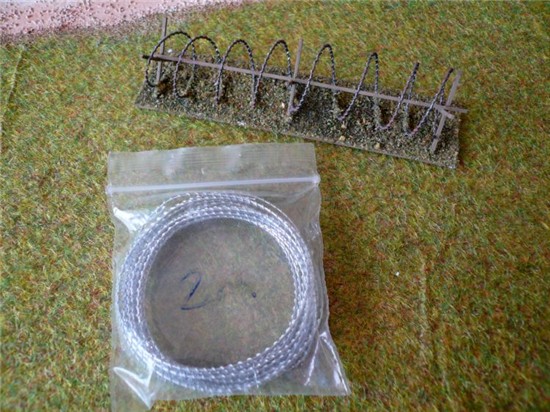
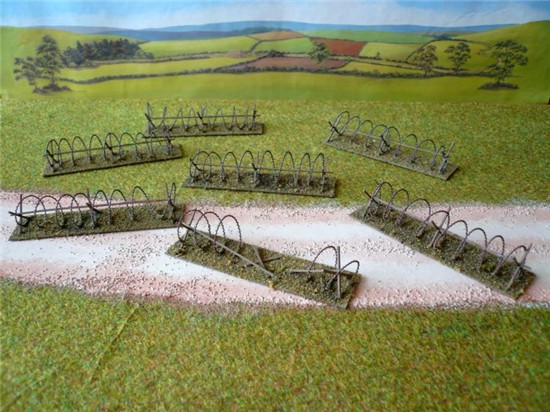
Some years ago I bought a couple of packets of 20mm barbed wire as this is a battlefield essential. The photos above show the result of a couple of hours work. The base is 40 thou Plastikard cut into 4 inch sections (and the width of my ruler!) and the wooden battens are 40thou x 40thou plastic strip pieces each 25mm long. The wire is then wrapped around a felt-tipped pen to make the shape before fixing to the battens/base with Superglue. The wire is painted Humbrol 53 (gunmetal) and the battens Humbrol 110 (wood) - both acrylic. The wire is then dry-brushed with Humbrol rust and the base flocked in my usual manner. One section (see lower photo above) was made to look as if it had been breached by a vehicle. In the game, once cut, this section could simply be removed.
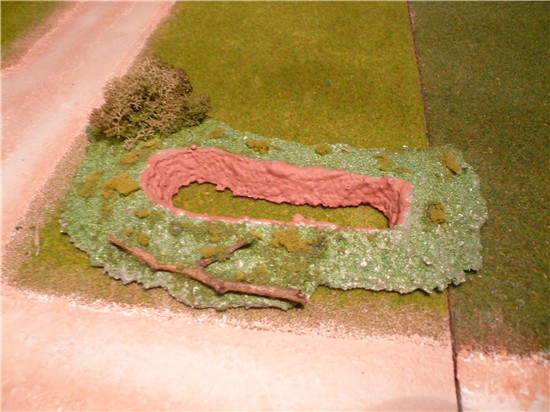
These last two pictures show a simple version of the trenches that I use. Make sure that the holes are bit enough to fit your figures (I had to change these ones having forgot to check!!). Any flat pieces of polystyrene can be used as long as they are not more than about 1cm thick (for 20mm figures). The more complex pieces are cut into trench systems for mortar/artillery pits or command posts. There are plenty of good pictures in the Osprey books showing these types of defences so copy from there rather than make up your own designs.
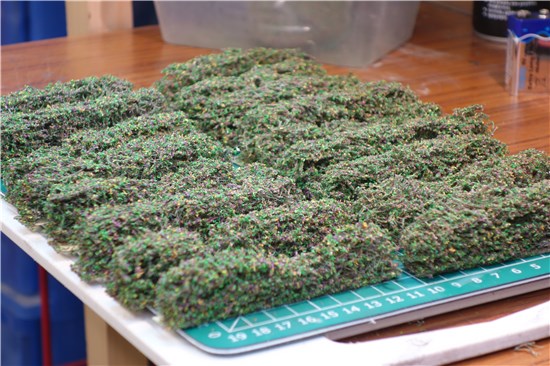
The old way of making hedges was OK but having seen a video on the YouTube of The Terrain Tutor, I ordered some rubberised horsehair and tried a different method.
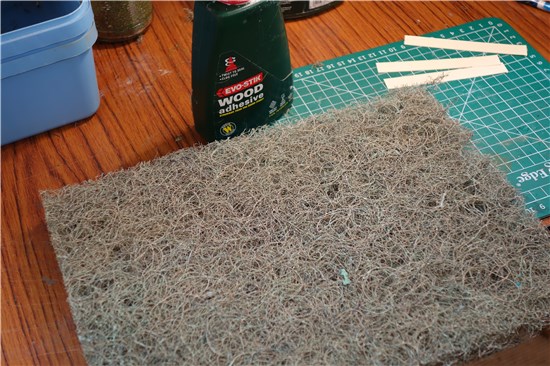
The stuff comes in sheets of A4 (at least, thats how I bought it) and its about 2cm thick. It is literally like rubber so is easily cut with good scissors. I tried a craft knife but with less success.
I cut the sheet into 2cm strips widthwise and then cut these strips in half to produce "fingers". The tops were rounded and some of the uniformity cut out so that they looked like hedges, not rubber strips. PVA was used to glue them to card bases and they were left overnight to dry.
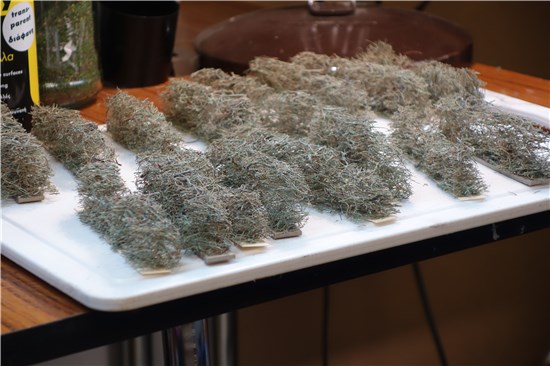
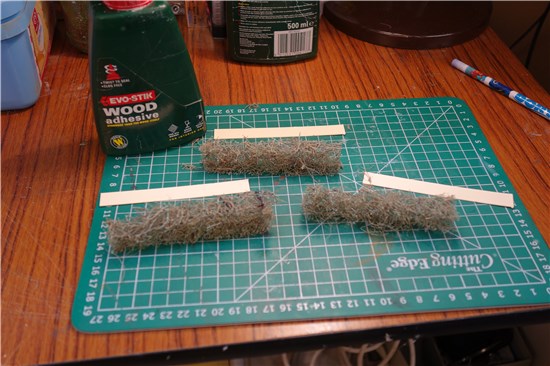
The 2 sheets I bought made loads of strips. They were then sprayed with spray adhesive and a mixture of various terrain "flock" material was scattered on. The mixture gave them a bit of a uniform finish but I will add touches of colour with yellow, red and bright green flock in due course.
Here is the finished article waiting for that splash of colour. I left them overnight again to dry after adding the flock. If they start to show signs of wear, I will simply flock them again and could add a sealant. For these ones, I just used a cheap hairspray (so they smell nice!!)
A feature on the modular hill system pieces appears in the Gallery section.
The above "hills" are consigned to the past. A new modular hill system is now in use and they are easy to make.
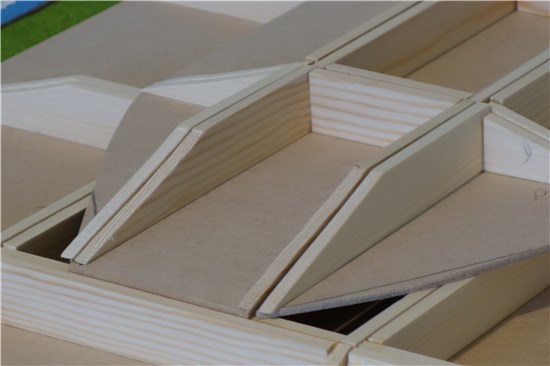
Above left - Basic squares of 3mm MDF which are 6 inches square were the basis. These fit in with my 24 inch x 18 inch boards. Make yours to fit your baseboard/roads system. Above right - 1 inch stripwood was cut to fit around the edges. The 3 inch slope is common to all slopes on all pieces. Note how different shapes fit together. Some 6in x 6in squares were cut in half. Shapes include solid blocks, slopes, half blocks, half slopes and external & internal corners. They can be layered as shown.
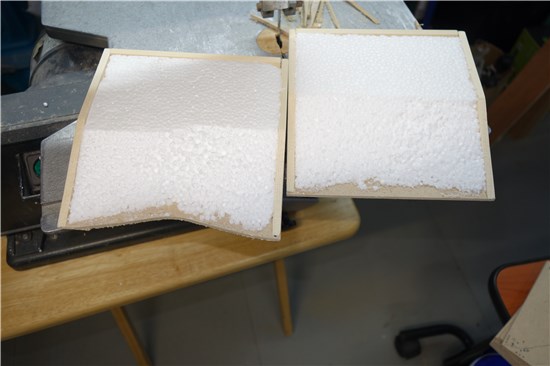
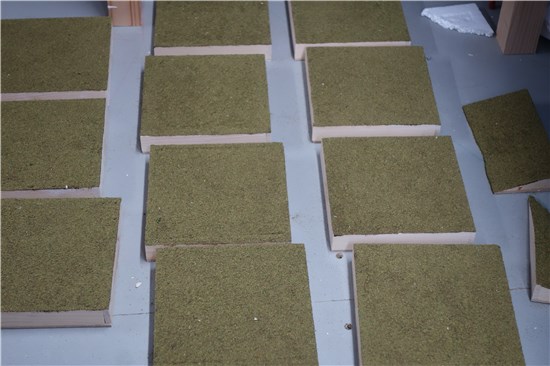
Above left - The middles are filled with polystyrene (or Styrofoam) and shaped where required. This is a messy job if done with a knife so a "hot wire" cutter is best. These can be smelly so make sure you have plenty of ventilation!! Above right - After a bit of filler and some of my PolyTex (c) covering, the tops are flocked over PVA. I use ordinary flock available from model shops. Spray over with matt varnish to seal everything in. Static grass does not work here as the pieces need to have the ability to stack on top of each other. The wooden edges are painted brown using any acrylic or waterbased paint.
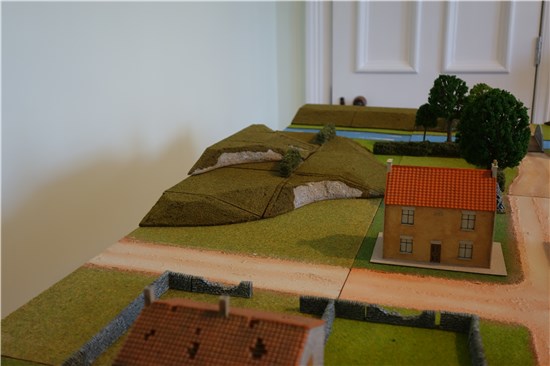
Above left - Here is the finished article in use during a game. I can't find a suitable flock to match the baseboards but that is not a major issue. The flat tops allow scenic pieces to be placed to make woods, broken ground etc. In the foreground is a "reducer" piece - reducing the width from 6 inches to 3 inches. You can start with a dozen or so bits and then make more as you find shapes you need. I now have some with roads on too! Above right - note here how I have carved a cliff face into the corner and painted it a chalk colour. This can become "impassable" in your game if required. It also adds some texture to the hills. An internal corner piece is used here between the cliff corner and another 6 in x 3 in half-corner. These are combinations you will discover and they make interesting hill forms. A line of plain slopes in the background make a nice riverbank.
Buildings can be based and given suitable adornments. Here an old
Airfix/Dapol English cottage (intended to be used for my Defence of the South Coast campaign) has a garden that includes a tree and hedges.
Below is a farmhouse built from plans appearing in the Railway Modeller magazine many years ago - it has Somerset origins I understand. With a pantile roof, it becomes somewhat generic and certainly has been used in various games in various countries!! The windows are simply painted on rather than the usual deep-framed version I would use on the railway layout. This building has no base and so can stand alone in a field or surrounded by hedge sections.
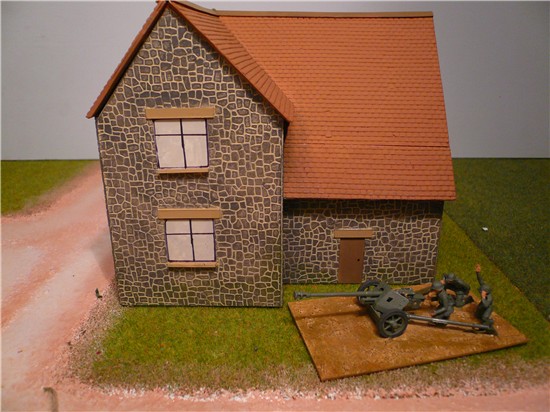
Incidentally, the PAK AT gun in the foreground highlights the issue of basing - the yellow/green is meant to allow it to go anywhere but it clearly stands out on the green flock paper. Basing it on a section of flock paper would make it difficult to deploy on the road......... (Gun from Italeri, crew from various sources)
(below) No, not the result of an artillery attack!! The underside of the farm house shows the simple Plastikard contruction and the fact that I forgot to paint the undersides of the window cills.

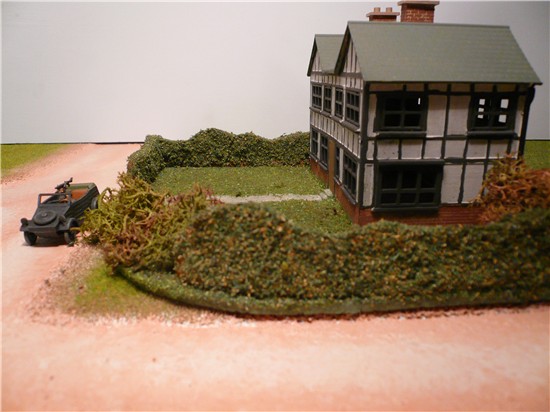
The British pub building referred to earlier. This is an ancient Airfix/Dapol kit set onto a cork tile base with a "garden" constructed as per the cottage earlier. However, this time, the hedges are chopped scourer pad covered with PVA and then flocked. This makes a thinner but rougher style of hedge perhaps more suited to "bocage". Note the shaped base to fit the building into a corner and the path from the front door to the kerb where a Kubelwagen waits for its crew. (Car from Airfix)
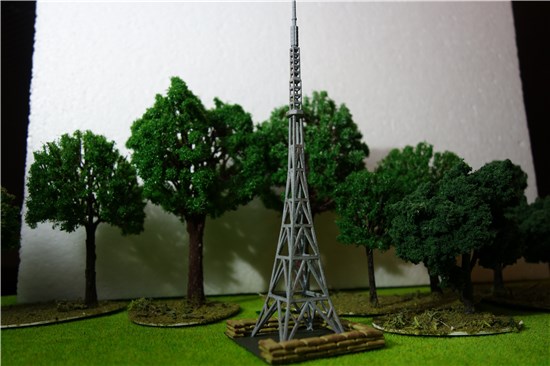
Below; This 3D printed communications tower is really too small for 20mm but is still very useful as the centrepiece of a radio or radar station. (Tower : Brigade Models)