Wargaming - Where to start?
I have had a few emails from folk asking where to begin when confronted by a new set of rules – or indeed a new way of playing a game – like FYOB.
I thought therefore that it might be useful to share my experiences in the hope that it might help others.
Begin at the beginning
Some years ago when my son started to get into Games Workshop battles, GW produced a basic rulebook (about 300 pages mind!) in the back of which was a simple explanation of the game mechanism. The illustration pitched one Space Marine against one Dark Elder (or similar nasty – I cannot remember the details). The “game” comprised a move and a shot by either side and showed how the attack and defence values worked, how to move, the effects of moving and firing etc etc.
This is a sound principle on which to start. Whilst it is tempting to launch into the Normandy landings or The Battle of The Bulge as your first wargame, my advice is to start at the opposite end of the spectrum.
Use a small board – perhaps 3ft x 3ft and set out a road, hedges and trees, a few stone walls and perhaps a building.
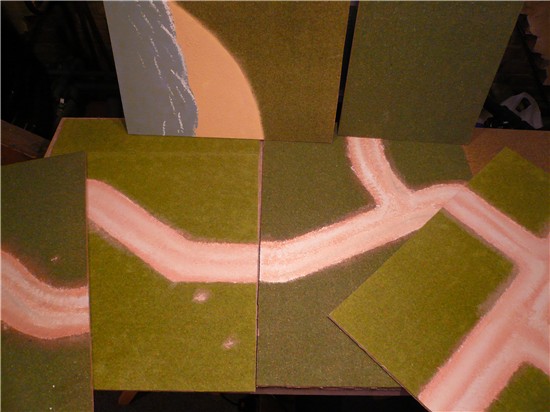
Above: My modular board system described elsewhere on this site. A few boards is all you need to get started. Add more later when finances and space allow.
Now take an infantry element for each side. The size of this element will depend on your ruleset - in Heroes All it will comprise 10 figures and represent an infantry platoon.
The objective of the game is to drive the enemy away – simple as that. Assume that it is the middle of the day, that both elements comprise regular soldiers and their Officers are average/regular etc.
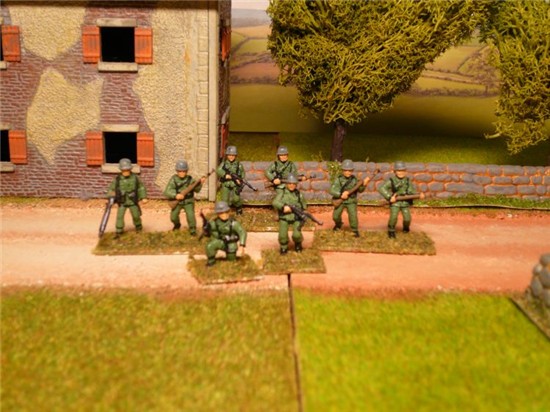
Above: A short-handed 8-man German platoon element for Heroes All. These small groups are easy to assemble and paint to get you started. (Figures by Valiant)
This short game will give you an insight into;
- The flow of the game rules and mechanisms (Heroes All and FYOB I hope!!)
- Observation and spotting
- Moving infantry
- Firing infantry weapons
- The effects of range and cover on firing
- Assault (if your troops get close enough)
- “Morale” or similar and its effects
- How the FYOB paperwork works
The investment of a couple of hours in this game will set you up for what is to follow – a range of games with ever increasing complexity.
Game 2 Using the same board add another element of infantry to each side. Add a machine gun and a mortar (one to each side). Don’t forget to allow the mortar to fire smoke shells for cover. Try to engineer a situation where one element assaults another or uses hand-grenades.
Game 3 Allow one side to use trucks and other to use armoured transport (you may wish to use a slightly bigger board at this point but no bigger than 6ft x 4ft. A 4ft x 4ft space is more than enough.). Give one side a flamethrower and the other an infantry anti-tank weapon (AT Rifle, PIAT, Bazooka etc). This will introduce the mechanism for AT fire.
Game 4 Introduce a 3 inch/81mm mortar to one side and an Observation Officer for off-table artillery to the other.
Game 5 Give each side an armoured car or light tank
Game 6 Allow one side to call an air strike and the other to have a concealed element on the table. Alternatively, introduce a SPG firing HE
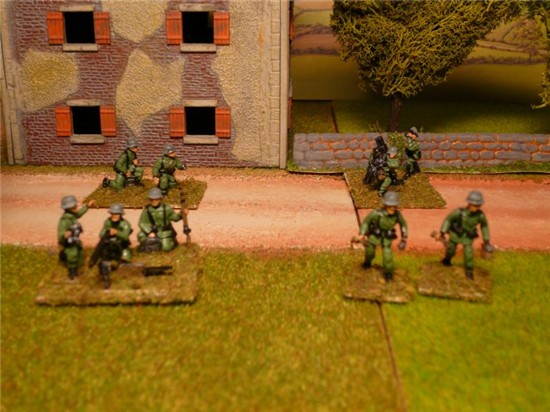
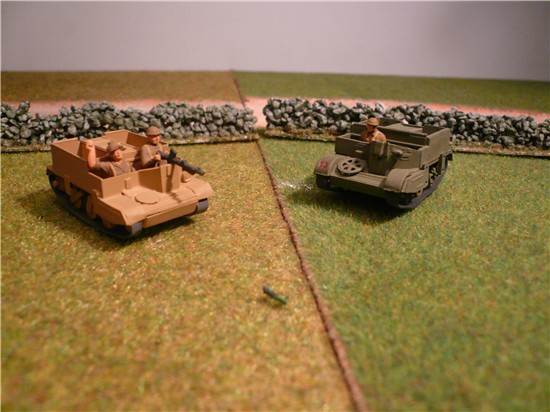
Left: German infantry upgrades - back left is a 2-man FOO element controlling off-table artillery, back right is a 81mm mortar team. Front left is a MMG element and front right is a 2-man PanzerSchrecke team. (all part of the Valiant German infantry battalion)
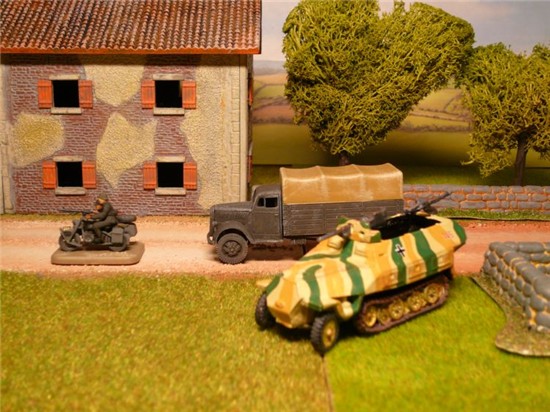
Right lower: German upgrades - a motorcycle combination with a MMG mounted that could be used as Recce troops, an Opel Blitz truck for transport (soft skinned) and a SdKfz 251 variant for armoured transport. These are all added slowly as your experience grows. (Motorcycle by Italeri, Blitz by Esci, SdKfz 251 is a resin model from an unknown source)
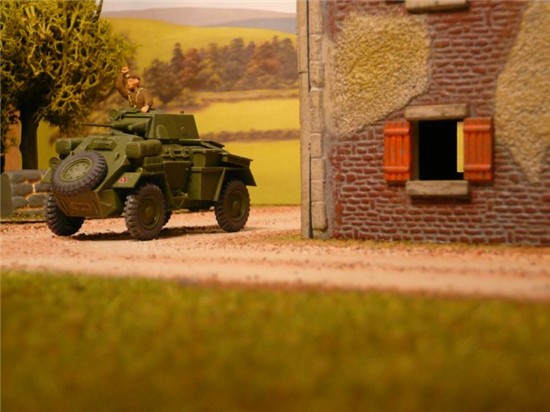
Above left: This British Humber armoured car is an easy model to build and will give you a taste of armoured warfare in your small games. Their lighter armour and weaponry make them better suited to a small table than the the heavier gunned tanks. These cars were used for recce duties so try a game with a British patrol seeking out the enemy position. (Model by Hasegawa)
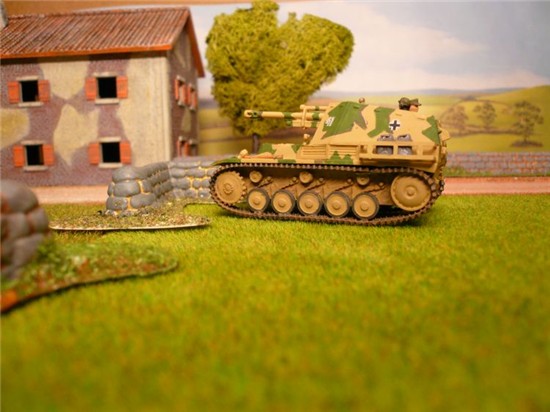
Below: You might need a slightly bigger table if you are going to bring artillery right up to the front - this German Wespe 105mm self-propelled howitzer for example (Italeri model)
This could go on but you get the idea? At each stage, a few more models are added to what is already there. This does not break the Bank in terms of a cash investment and also reinforces the basics at every stage. By the time you are playing game 4, you will not have to refer to the infantry movement/firing rules – they will become second nature.
A word of advice here – once you get to game 6, before you introduce legions of tanks, special rules for snipers and other obscurities, go back to game 1 and have one side play as elite/veteran troops. Play again with one side as poor or green.
Go through all of the games using troops who are not Regular or with officers who are not Regular – make one Bold or another Weak or make the Strategic Milestones different for the two forces. (see Heroes All or FYOB for definitions and implications).
Having run through the 6 games again, add another twist – stage the action during the night bounds, limit the ammunition of guns etc. (Rules for both of these circumstances appear in Heroes All and FYOB).
See how a step-by-step approach gives you a huge number of small games, each one different and each one building on your knowledge of the rules? It is then a small leap to a bigger game using more elements.
Even now I play out small games like this to test and evaluate rules and mechanisms, or just to understand what a set of rules is telling me. It is easy to set out game 1 and have a minefield in play. Replay game 2 but give one side some engineers to clear the minefield. Play again with a “Flail” tank option.
Similarly, I play small games with a parachute drop, Special Forces elements, rough ground where tanks can bog down, cliffs to climb etc. In each small game, I take the basic knowledge I have and learn a bit more.
Oh and along the way, I get to play a game very regularly into the bargain – brilliant!
Little By Little
The process of playing a small game and building up has the added benefit of helping the financial situation as well.
Whether you are using metal or plastic troops and “Quick Build” or fine-scale diecast armour models, it all costs money so any way to spread this cost will always be welcome.
The games mentioned above can all be played with just a small investment in troops and vehicles. The biggest outlay might be the scenic parts for the board but when you are starting out, pan-scourers and cotton wool can be used to make hedges and trees. Elsewhere on this site you can see examples of scenery made from polystyrene and flock with a bit of lichen. Don’t forget that this is just a representation of the terrain – you are not building a scale model of the countryside!!
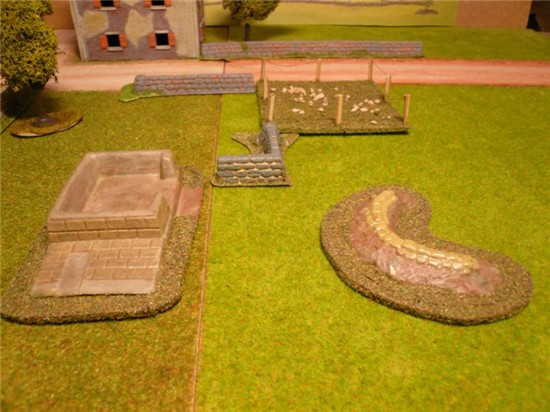 Left: Adding some terrain pieces is a cheap way to spruce up your games. These are Bellona pieces in the foreground with a scratchbuilt 4in x 4in minefield section in the background.
One important way to cut down on buying stuff is to make it yourself. In the world of Model Railways, it is not uncommon for monthly magazines to carry drawings of buildings, wagons, or even locomotives from which the enterprising can make their own models. Strangely, the Wargaming world does not follow suit and so it is not easy to find drawings for Bren Carriers or Opel Blitz trucks. It is not unknown for modellers to copy a kit and make their own models from it but you may think this unfair to the kit manufacturers, most of whom make small margins anyway on each kit sold.
Left: I know that I have used this photo elsewhere but I repeat it here to illustrate the point that you can build your own small vehicles to grow your army on the cheap.
Now that Heroes All and FYOB 2021 have been launched, focus has turned to the Fight Your Own Battles YouTube channel where I will post short videos on the rules, hints and tips for playing the games, discussions on certain rule mechanisms and maybe how to make some models.
Another money saving device is a time-line. A bit of research on the Internet will give you an insight into which weapons, vehicles, guns etc were in use during the time you are modelling. In this way, you do not buy models that out of your era thus saving cash and the time taken to build them if they are kits!! From the time-line (or internet sources), draw up some Orders of Battle (ORBATS) for your armies at different times during the conflict. This keeps your focus on what to buy and avoids unneccesary expense.
The time-line is an important tool to ensure historical accuracy as well. Interesting though it may be, a duel between a troop of British Vickers Mk VI tankettes and a German Tiger II has no historic basis. Replacing your Tiger with some Panzer II or Panzer IV vehicles gives you more scope to play more historically correct scenarios.
Finally, don’t under-estimate the old trick of using one model to represent another. By this, I don’t mean using one tank pretending it to be something else (although we've all done it), I mean using a 2-man Observation team to represent an off-table artillery battery, or a simple token to indicate the point of attack for an in-coming ground attack aircraft (which you do not have a model of). When a parachute drop is taking place, you do not need models of men in parachutes – just the figures to place on the table once they have landed.
Conversely, whilst I rarely use British Commandos (Special Forces rules apply), I have about 30 or 40 of them in different poses and so can have them scaling cliffs, paddling canoes or whatever – I just select the requisite number of figures from a “pool” of those available. The big difference here is that they came from a job lot bought on eBay for a few pence!
A question of real estate
We have all been to a show or picked up a magazine and seen games played across a wide expanse of tables covered in detailed scenery. And most of us get jealous at some point.
Do try to remember that the gamers using these tables all started where you are now – a small board and a few trees. Whilst you may not have bags of space now, one day that might change.
You will be very lucky to have a big space available from day one but this may not be such a disadvantage. Think about the number of buildings, trees, hedges etc that you would need to cover a 10ft x 6ft games board!!
There are 2 options for gaming boards – a fixed base or a modular base. A fixed base is just that – a plain board of plywood, chipboard or mdf etc, painted a neutral green colour and situated on a table or it's own integral legs. Onto this board, you can lay card or plastic roads and rivers and then add hedges and trees to suit your game. When the game is done, the whole thing is packed away. It has the advantage of total flexibility in terms of roads and rivers etc but has the disadvantage of size (if you only want a small game) and immobility. A 6ft x 4ft board is the size of a double bed and not so easy to store or to use without disturbing the domestic arrangements. There is also the problem of trying to move it yourself – particularly if passages and stairs are involved.
The modular base is more flexible in terms of storage and mobility but has the limitation that the modular boards only offer the geography that is cast into them. I use a modular board system (see elsewhere on this site) with 6mm Medium Density Fibreboard boards of 24in x 18in and 24in x 12in. (This is how the product is known in the UK - other countries' names may vary.) Roads and rivers are painted onto the boards, exiting at fixed points so that boards line up with each other. The sizes I use mean that the local timber store sells me a 4ft x 2ft sheet and I can get 2 large and 1 small board from it. All are double sided.
There is a big advantage with this system in that you only need a few when you start out. Adopting the module sizes I do means that a 4ft x 2ft sheet of material will give you 3 double-sided boards and thus loads of permutations – remember that the boards can sit next to each other with a number of combinations possible. When you want to expand your table, buy another sheet of material – the current UK cost is about £10.
The disadvantage is that the boards offer little in the way of depth so any hills or hollows have to be created by the scenery.
A small board means a few trees and lengths of hedges, perhaps one or two buildings and (if required) a small number of hills and hollow sections (made from polystyrene and flock of course). As you buy add more boards, add more trees, hedges etc.
The key word here is incremental. You grow your forces, boards and scenery by small increments.
Occasionally, you find a specific scenery piece that demands a new direction. When I made the Airfix bridge conversion (see the Bridge Game photos), it required a number of boards with a wide river so that the bridge could be used. Up until then, I only had a small bridge and some boards decorated with “stream” sections (much in the same way as the road sections). However, not only did this give me some new boards to battle on but it triggered some new scenarios and I rediscovered the delights of a small skirmish game. Previously I had thought that the bridge would make a good centre-piece for a big brigade-level encounter but to date, that has not appeared as I am still enjoying small-scale actions based on holding/taking the bridge!!
Finally, in terms of your buildings, I would recommend a trip to the library or a session on the internet to seek out good photographs of the property you need. A few buildings can make a village and if you add a church and a farm, you will have something to fight over. I like generic houses and barns, huts and the odd ruin. I confess to have cheated somewhat with my Operation Diamond campaign as it is set on British soil so all those drawings of buildings in my Railway Modelling magazines can be used. A few pieces with a vague architectural heritage would allow me to create a scene somewhere in Belgium or Germany or wherever whilst wooden farm buildings and tall residential blocks can offer an Eastern front flavour.
There is now a growing range of resin buildings coming onto the market and (for 20mm) I find the Airfix and Italeri buildings are useful. Armourfast make a few plastic kit buildings but they are 1/72 and clearly larger than the Airfix 1/76 models.
Don’t forget that a pile of ruins is a pile of ruins in any language so a few of those will always be useful!!